If you have found your way to this blog post, chances are you have seen an episode or two of HGTV's Fixer Upper. Or all of them.
Sadly, we cut the cable cord a year ago so I'm a full season behind but it seems like Chip and Joanna are everywhere these days. And I've seen enough to know that I love Joanna's style. I love how she mixes old and new. I love how her rooms are simple and clean. I love how she values functionality and purpose in her designs. And yes, I'm going to say it: I love shiplap.
Generally I'm more inclined to resist trends than to embrace them. But I can't help it. I just love it. I love that it adds so much dimension and texture to a room without competing with other design elements. I love that it's a throwback to simpler times and changes how a room feels.
So, when we decided to refresh our master bedroom I knew I wanted to add some shiplap to give it some farmhouse charm. I read a bunch of tutorials on doing faux shiplap and it seemed almost too good to be true. Ultimately, now that the project is behind us, I would agree that it is a fairly easy DIY project and the results exceeded my expectations.
Here's how the project came together for us:
I've read that you can have Home Depot rip the 1/4 inch finish plywood into six inch strips for you. Depending on your location they may charge you a small fee per cut but I have also heard people say their store did it for free. If you don't have a table saw it's definitely worth a few bucks to have them do it for you. We had the plywood leftover from another project and we do have a table saw, so we were able to do it ourselves. We cut the 8 foot sheets in half first so the pieces would be easier to work with. Then we ripped those into six inch wide pieces. So we ended up with a whole bunch of 4'x6" strips.
Next I used a sanding sponge to clean up the edges a bit and applied two coats of primer. We were ready to nail them up!
The full pieces went up so easy. I used a nickles as spacers and a nail gun to nail them to the wall. We nailed into studs wherever we could but sometimes that wasn't possible. Using adhesive would probably be a good idea but I chose not to. I'm pretty protective of our house and since this might be something that the next owners choose to take down, I didn't want to permanently damage the walls more than we needed to. If any of the boards do come loose I will apply some adhesive.
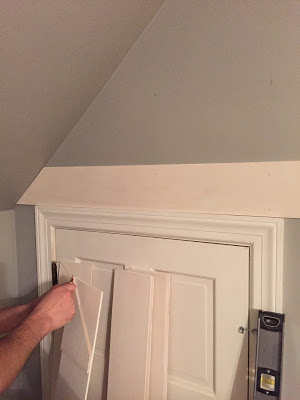
If you are going to do this to a rectangular wall you will have a much easier time than we did. Between the window, the door (it leads to an attic above our screen porch) and the slanted ceilings we had to custom cut almost every piece. My husband got pretty good at calculating the angles of the ceiling. The house is old so we had to keep checking and making adjustments. You know, the old saying: Check three times, go down to the basement and cut it, come back up, realize it's wrong, adjust the angle, go back down to the basement, come back up, decide it's good enough and nail it! Flawless system!
It really wasn't so bad and even before all the pieces were up I started filling the nail holes with paintable nail filler. I just used my finger to apply it to each hole and then put any excess into the next whole. Once all the nail filler was dry I used the sanding sponge to smooth it out and I was ready to paint.
 |
| Pretty textiles, coffee and a paintbrush. My ideal naptime! |
I love to paint. I'm not artistic. I can't paint a picture but I love transforming things with paint. It's soothing to me and I'm determined to find more opportunities to do it. For this wall I chose Behr Silver Lining. It's a pale gray that is three or four shades lighter than the other walls in the room which were painted several years ago with Behr Porpoise. It really brightened up the room without being obvious that it was a different shade. The room has windows on three sides of the house which does interesting things with light in there so it's almost impossible to tell that the walls are different shades.
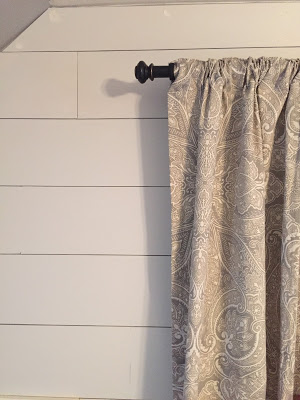
I did two coats of paint on the whole wall. It was difficult to paint between the boards because they were only a nickel-width apart but that wasn't a problem since the previous wall color and the new color were similar. Depending on what color you are covering, you may want to consider painting the wall(s) prior to putting up the shiplap but that was one less thing for me to do. As long as the two colors aren't completely different I wouldn't bother but use your own discretion.
Since the plywood was so thin (1/4") I had no issues butting it right up against the window/door trim and the baseboards. If we were doing real shiplap it may have required taking down all the trim so this was another reason we liked the idea of the faux version.
I'm not sure how long it took to complete since we were only able to work on it in such small chunks of time. It was difficult to work on it during the day because toddlers, nail guns and paint don't really mix well and we couldn't work on it when they were asleep since the nail gun and mitre saw were too loud. So we squeezed in time in the evenings for a few weeks and I got some of the painting done during naptime (theirs, not mine!).
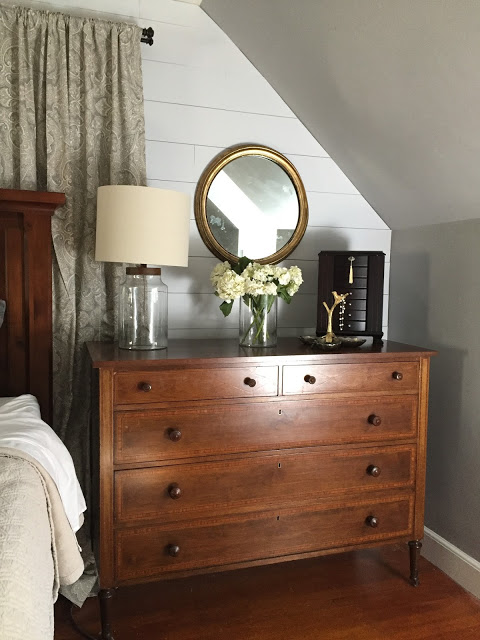
Once it was all painted the real fun began: putting the furniture back in place, hanging the artwork and mirror, installing the new curtain rod. You can read more about the whole refresh
here.
My husband was skeptical about "covering up a perfectly good wall with strips of wood" when I first came to him with the idea. I had to do a little convincing but in the end he was a believer and we were both really thrilled with the results. There will definitely be some more faux shiplap going up around here in the near future!
Thanks for following along and if you have any questions about your own faux shiplap project I would be happy to try and answer them!
Kaitlin