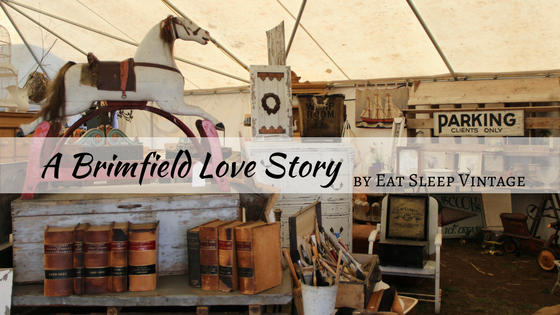
Brimfield dealers all have their own personal stories of how they found their way to the epic show. Most started as buyers and eventually worked their way into selling. Some have been coming since childhood while others discovered it later in life. In this post, Maureen of Eat Sleep Vintage, is sharing the story of how she fell in love with antiques and how Brimfield found a place in her life. Enjoy!
- Kaitlin

You can find Eat Sleep Vintage at New England Motel. Use the app to find her exact location using GPS! Follow her on Instagram and Facebook to get sneak peeks at the beautiful items she finds.
Want to learn a bit more about other dealers? Check out some of my previous profiles of Rustored Salvage, Anthony Rosa Modern, Juniper Hill, Knock on Wood Antiques, Heja Home, Walker Homestead, Juniper Vintage, and the good home!
The Brimfield Flea Finder app was developed specifically for the Brimfield Antique Shows. The app is free to download in The App Store. Visit www.brimfieldapp.com for more about the app and www.brimfield.com for general show information.
- Kaitlin
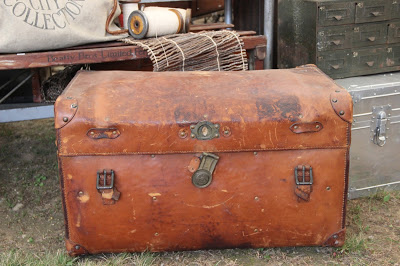
Eat Sleep Vintage. This name personifies me and my love for antiques...I'm not sure how I fell in love with them. I didn't grow up with them in our home, but I remember being about 17, and happened to stop at a garage sale while out and about one day and I found an antique sideboard and it was cheap! Maybe $30...What?? The craftsmanship was beautiful with carvings in the tiger oak. The gentleman told me about the history of it and I had to have it. I got it home somehow and put in the basement, saving it for when I would be out on my own one day. From there my addiction started...scouring flea markets and garage sales, learning about antiques, the beauty of them, the history, and the stories they told. Making numerous friends with dealers and shop owners, and acquiring a ton of things, storing them away for "some day"...I remember my father yelling, when are you going to get rid of that junk, as the basement was now full. It amazed me what could be found out there for little to no money..such treasures! What is wrong with people, don't they realize what this is?? My heart raced just thinking about some of the things I was lucky to find.
Eventually, I did move out and furnished my apartment with all of my finds, and years later, I opened an antique shop! I loved that store and all the years of buying and displaying and telling people the stories of where they were found or what they were, and sharing my excitement for these things...Throughout all of those years, I had always heard of this place called Brimfield. I remember when I was young seeing Martha Stewart on TV at this gigantic Market, having no idea where it was, but my heart....just watching her. I had to go there! As I bought from dealers over the years, they would point to a rare piece and say, I'm saving that for Brimfield...What the heck is this place.......
Finally, in 2004, I said, that's it, wherever this is, I'm going! So I mapped it out and emptied my truck, and off I went. It's was a 3 1/2 hour drive, but well worth the trip. When I got there a day ahead of the show, I ventured out to see what everyone was talking about. I couldn't believe it! Everywhere you looked there were tents and fields and people and things and nonstop antiques, with things you have never seen before. Whatever you collect, it is there. I almost fainted, and thought, I am going to be broke!...and i was..but after a week, my car was loaded to the brim, with things tied to the roof..and had so much fun meeting all of these new people and hearing their stories...What an adventure..I went almost every year.
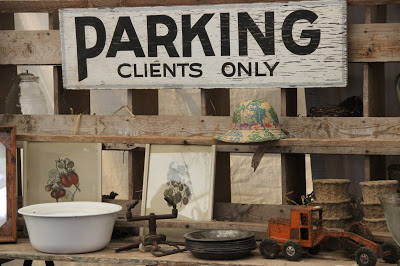
So fast forward to now...Last year, I decided, my big ideas, I should sell there! Why not? I only run a retail store and a wedding event planning business...I have time...I go there, I shop I love it...why not set up a booth? well...think of it as joining a carnival for a week, because that is exactly what it is like...it takes months of preparing, thinking of how I want my booth to look, finding the right pieces, etc..making signs and tags, envisioning the feel I want when people walk in...renting a giant truck..loading up for 2 days and packing it to the brim..Then driving it up for 3 1/2 hours..Have you ever driven a large rental truck? When you get there, you check in and go scour the fields for a porter to unload you, they're all over the place but you ask for recommendations...and you shop around and you make new friends while you're out..and buy things! You spend money before you even begin...Then there is the set up..setting up your booth like a little store...creating vingnettes and pretty displays..hanging and tagging things, borrowing tools and ladders, getting everything in place in just a day or two... Meeting all of your fellow dealers around you, listening to their tales of the shows before. Most of them will sleep right in their booths or in their cars on the field for the week....O.k..why not? save a few dollars in hotel fees...sure...So I stayed in my truck the last show, thinking, lets try it?, it was now empty and like a little apartment! So I dragged in my blanket and pillow and set it up on the floor, brought in a lamp, with a 100 ft extension cord going out to find power..pulled down the back door part way and viola! So what that it's hot and there are bugs, so what....And you get up in the morning and walk down to the showers...lugging your bags and your clothes...and wait in line to try to freshen up and get ready for the day, venturing out early trying to find coffee and maybe a food truck with something to eat, then back before 6 a.m. as it's opening day!! They are piled up in front of our field in a hoard just waiting for 6 for the gates to open. And so it begins...the madness...the rush of the dealers running through your booths trying to find bargains and get deals..but you wait, there is a whole week ahead of you. And the day goes on and its all a blur, but you've met so many interesting people from all over the world and talked about their finds..and wished you were out there...and after 12 hours, we freshen things up and close our tents and get ready for tomorrow. The dealers on the field walk around and ask how you've done and who sold what and we tell our tales..there are drinks flowing and music playing and we are all exhausted, but we will do it all over again in the morning...I have so many stories from that week, so much fun and have made some great friends...Thanks to my tent mates, who would watch my booth while I ran for "coffee" and perhaps a giant 8 ft barn door that I saw right there!! that I had to buy while waiting in the starbucks line...and we'd scour the new fields on their opening days as others kept watch...Everyone does look out for one another...it's a wonderful group of people, these dealers from all over. All with a love and appreciation for these beautiful things..and it's crazy and so fun and a ton of work, but I will do it all again in May and I can't wait! You see?? my heart! I eat it and sleep it and dream it and love it...and I'll take you along on my journey, but you really should try to come!! See you there!
- Maureen
You can find Eat Sleep Vintage at New England Motel. Use the app to find her exact location using GPS! Follow her on Instagram and Facebook to get sneak peeks at the beautiful items she finds.
Want to learn a bit more about other dealers? Check out some of my previous profiles of Rustored Salvage, Anthony Rosa Modern, Juniper Hill, Knock on Wood Antiques, Heja Home, Walker Homestead, Juniper Vintage, and the good home!
The Brimfield Flea Finder app was developed specifically for the Brimfield Antique Shows. The app is free to download in The App Store. Visit www.brimfieldapp.com for more about the app and www.brimfield.com for general show information.